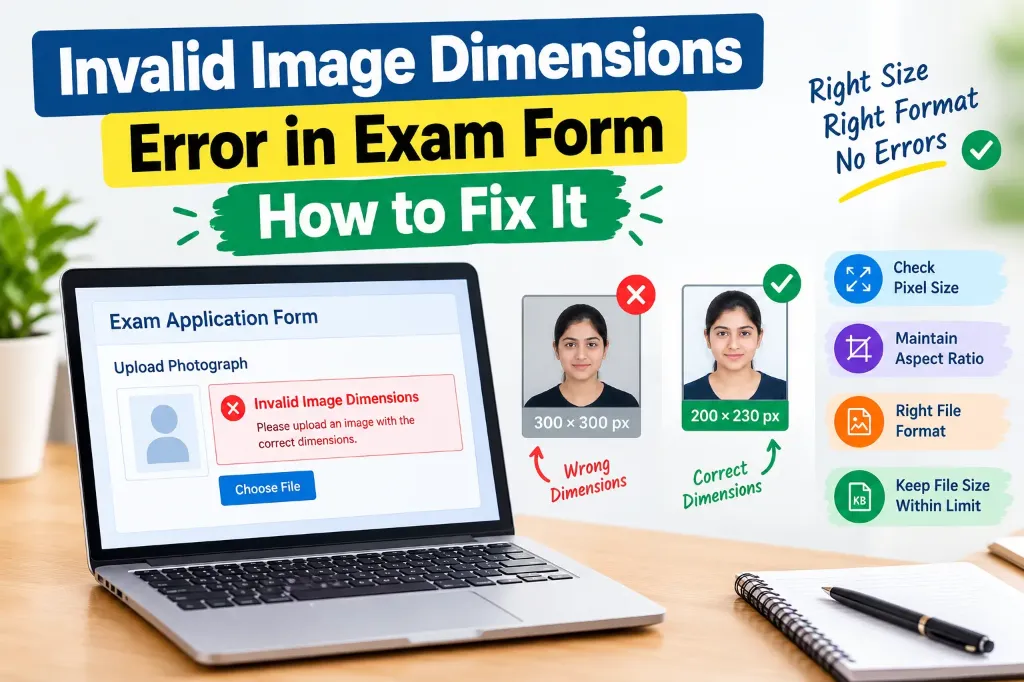
You have scanned your photograph or signature, resized the image and tried to upload it to an exam application form. However, the portal still displays an Invalid Image Dimensions error.
This problem can be frustrating, especially when the application deadline is approaching. The good news is that you can often fix it by checking the actual pixel dimensions, correcting the image proportions and following the requirements listed on the official application portal.
Many candidates confuse image dimensions with file size. An image may be smaller than the allowed KB limit but still fail validation because its width or height does not match the required pixels. If your upload failed entirely, you can also consult our guide on Signature Upload Failed in Online Application Form: Causes and Solutions.
This guide explains why the error occurs and how to fix it step by step without compromising the clarity of your photograph or signature.
What Does Invalid Image Dimensions Error Mean?
The Invalid Image Dimensions error means that the uploaded image does not meet the portal’s accepted width, height or aspect ratio requirements.
For example, an exam portal may ask you to upload a photograph measuring 200 pixels wide and 230 pixels high. If your image measures 300 × 300 pixels, the portal may reject it even if the file size is within the permitted KB limit.
The portal may display messages such as:
- Invalid image dimensions
- Incorrect image width or height
- Image size does not match the required specifications
- Please upload an image with the correct pixel size
- Photograph or signature dimensions are not acceptable
Each message points to a validation check failure on the portal’s server.
Why Does the Exam Form Reject Your Image?
Several common issues can trigger an invalid dimensions error:
1. The Width or Height Exceeds the Permitted Limit
Some examination portals specify minimum and maximum pixel dimensions. An image that exceeds either limit will fail server validation. For instance, if a portal accepts a maximum width of 500 pixels, an image measuring 800 pixels wide will be rejected.
2. The Image Is Smaller Than the Minimum Requirement
A low-resolution photograph or signature may fall below the required dimensions. Enlarging the image digitally does not improve its original quality, so start with a high-resolution source image whenever possible.
3. You Entered Centimetres Instead of Pixels
This is one of the most common mistakes when using image resizing tools. A portal may require 200 × 230 pixels, while you enter 200 × 230 into fields that expect centimetres. The resulting image becomes thousands of pixels wide and fails instantly. Always verify the measurement unit.
4. The Image Has the Wrong Aspect Ratio
The aspect ratio describes the relationship between an image’s width and height. A square image has a 1:1 ratio. An image measuring 200 × 230 pixels has a portrait ratio. If the portal expects a rectangular signature or portrait photograph, uploading a mismatched shape triggers dimension rejection.
5. You Resized Visually but Not in Actual Pixels
Reducing the displayed size of an image on a screen does not change the actual pixel dimensions of the saved file. You must use a dedicated image editor or resizer to update the underlying file properties.
6. You Uploaded the Wrong File
It is easy to resize a photograph or signature correctly and then mistakenly select the original, unedited file during upload. Always verify filenames and file properties before submitting, and keep all documents organised using our Documents Required for Government Job Online Application Checklist.
Pixels vs Centimetres: Understand the Difference
Pixels and centimetres measure two fundamentally different properties:
- Pixels describe the total count of digital picture elements in an image file.
- Centimetres describe a physical length on paper.
| Measurement | What it tells you | Where it matters |
|---|---|---|
| Pixels (px) | Actual digital width and height | Digital upload validation on exam portals |
| Centimetres (cm) | Physical print width and height | Printed photograph or scanned ruler specifications |
| KB or MB | Digital storage file size | File size upload limits |
| DPI or PPI | Pixel density relative to physical size | Scanning resolution and print clarity |
For example:
- In SSC CGL 2026 and SSC CHSL, instructions mention physical measurements (approx 6.0 × 2.0 cm or 4.0 × 2.0 cm).
- In IBPS PO 2026, instructions specify digital pixels (preferred 140 × 60 pixels).
- In IBPS Clerk 2026, declaration dimensions are 800 × 400 pixels, while signature dimensions are 140 × 60 pixels.
- In UPSC CSE 2026 and UPSC 3x Signature, dimensions must fall between 350 × 350 pixels and 1000 × 1000 pixels.
If instructions specify dimensions in centimetres as well as pixels, follow both conditions carefully.
How to Fix Invalid Image Dimensions Error in an Exam Form
Follow these steps to correct the image and upload it successfully:
Step 1: Check the Official Image Specifications
Before editing, open the official recruitment notification or the portal’s upload instructions. Find the exact required width and height in pixels, allowed KB range, and accepted file format (typically JPG/JPEG).
Step 2: Check Your Current Image Dimensions
On a Windows computer:
- Open File Explorer and find your image.
- Right-click the file and select Properties.
- Open the Details tab and check Dimensions (e.g., 640 × 480).
On a mobile phone, open the image in your gallery and tap Details or Info.
Step 3: Open the Image in a Resizing Tool
Open our free Signature Resizer Online Tool directly in your web browser. You can also follow our Signature Resizer Online Free Guide or use desktop software like Microsoft Paint.
Step 4: Enter the Correct Width and Height
Enter the exact pixel dimensions specified in the notification into our Signature Resizer for Government Job Form. Make sure the unit is set to Pixels rather than percentage or centimetres.
Step 5: Crop the Image if Necessary
If the required dimensions have a different aspect ratio from your source file, crop unnecessary borders first. For a signature, remove blank white space around the handwriting. For a photo, crop around the head and shoulders without distorting the face.
Step 6: Save the Image in an Accepted Format
Export the file in genuine JPEG or JPG format. Do not simply rename a .png file to .jpg.
Step 7: Check the Final File Size
After resizing, check the file size in KB. If it exceeds the maximum limit, apply moderate compression. Ensure the handwriting remains sharp and clear by reviewing our tips on how to fix signature image not clear in application form.
Step 8: Upload the Corrected File and Inspect the Preview
Return to the application portal, select the newly resized file, and inspect the preview carefully before final confirmation.
Example of Correcting an Image Dimension Error
| Property | Current image | Required image | Action needed |
|---|---|---|---|
| Width | 640 pixels | 200 pixels | Resize width to 200 px |
| Height | 480 pixels | 230 pixels | Crop aspect ratio, then resize height to 230 px |
| File size | 42 KB | Maximum 50 KB | Already compliant (under 50 KB) |
The image met the file size limit but failed because its pixel dimensions were too large. Resizing to 200 × 230 pixels solves the error immediately.
What If the Image Still Fails After Resizing?
If the portal continues to report dimension errors:
- The image editor did not save: Reopen the saved file and verify its dimensions in File Properties.
- Width and height are reversed: A requirement of 200 × 230 pixels (portrait) is not the same as 230 × 200 pixels (landscape).
- Mismatched aspect ratio: Review the official instructions and crop the file to match the expected shape.
- Browser cache issue: Clear browser cache, open an Incognito window, or reload the page.
- Separate validation rules: Check whether the portal enforces strict DPI requirements (e.g. 200 DPI or 300 DPI).
To understand how upload errors can lead to form rejection, read our detailed analysis on Government Exam Form Rejected Due to Signature: Reasons and Solutions.
Important Tips Before Uploading an Exam Image
- Confirm exact image specifications on the official recruitment portal.
- Always select pixels rather than centimetres when setting digital dimensions.
- Crop before resizing to prevent stretching or squishing.
- Verify the final file size in File Properties before uploading.
- Inspect the uploaded preview for clarity and correct alignment.
If you are a cyber café or Common Service Centre operator helping students, read our Signature Resize for CSC VLE Guide and CSC VLE Services Guide. For complete exam form assistance, read our Online Govt Exam Form Guide.
Official Resources and Technical References
Before making changes, always consult the official instructions published by your examination authority. For example, the UPSC Online Application FAQ provides guidance on photograph and signature specifications, preview checks, and troubleshooting technical upload errors. Follow the instructions for your own examination because rules differ between portals.