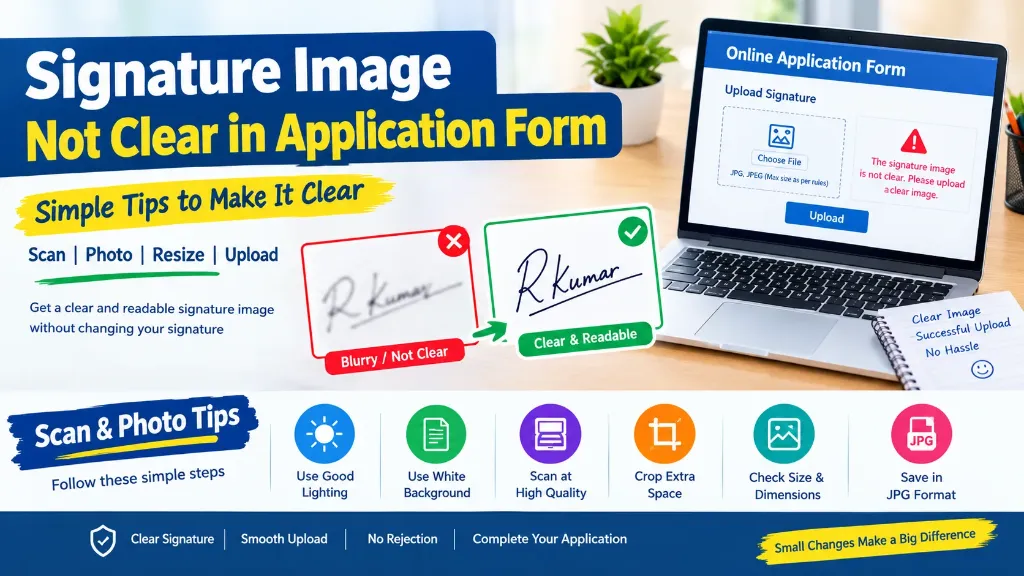
Have you uploaded your signature to an online application form, only to discover that it looks blurry, faint or difficult to read? This can be worrying, especially when you are submitting a government exam form, a recruitment application or an important admission document.
A signature image may look clear on paper but become unclear after taking a photo, scanning it, resizing it or uploading it to a website. Poor lighting, camera movement, excessive compression and incorrect cropping are common reasons for this problem.
The good news is that you can often improve the readability of your signature by preparing a better scan or photograph.
If your signature image is not clear in an application form, this guide explains how to identify the problem, capture a clearer image, prepare the file correctly and check it before final submission. The goal is to make your genuine signature easier to read without changing the original handwriting.
Why Is My Signature Image Not Clear in the Application Form?
A signature image can lose quality at different stages of the application process. Understanding the cause helps you choose the right solution.
Here are the most common reasons:
| Problem | Possible cause | Recommended solution |
|---|---|---|
| Blurry signature | Camera movement or poor focus | Take a new photo or rescan the paper |
| Faint signature | Light ink or uneven lighting | Use a fresh, clearly written signature if needed |
| Pixelated image | Excessive compression or repeated resizing | Start with a higher-quality original image |
| Dark background | Shadows or poor lighting | Capture the signature in even light |
| Signature appears too small | Excessive blank space around the writing | Crop unnecessary margins |
| Uneven or tilted image | Paper or camera was not properly aligned | Place the paper flat and capture it straight |
| Signature looks stretched | Incorrect resizing | Preserve the original proportions |
| Image becomes unclear after upload | File compression or portal preview scaling | Inspect the uploaded preview and prepare a better source image |
Before editing anything, open the original photo or scanned file. If that image is already blurry, resizing it will not restore the missing detail. In that situation, creating a fresh scan or photograph is usually the better option.
How to Make a Blurry Signature Image Clear
Follow these steps to prepare a cleaner and more readable signature image:
1. Write a Fresh Signature on Clean Paper if Necessary
Start with plain white paper unless the application instructions specify a different background.
Use a pen and ink colour that meet the requirements of your particular application. Many recruitment portals request a dark, clearly visible signature, but the precise rules can vary.
Write your normal signature naturally. Avoid rushing, pressing excessively hard or making unnecessary corrections.
If the original signature is faint because the ink is too light, creating a fresh signature may be more effective than trying to darken it digitally.
Important: Your signature should remain genuine. Do not trace over an existing signature, digitally redraw its strokes or substitute another person’s signature.
2. Take the Photograph in Good Lighting
Lighting has a major effect on image clarity.
Place the paper on a flat surface near a window with bright, indirect daylight. You can also use evenly distributed room lighting.
Avoid harsh sunlight that creates strong shadows or makes parts of the paper appear unusually bright.
Follow these simple tips:
- Keep your hands and phone away from the signature’s shadow area.
- Turn off the camera flash if it creates glare.
- Ensure the entire signature is visible.
- Hold the camera steady.
- Clean the camera lens before taking the picture.
Take a few test photographs and select the one that shows the original writing most clearly.
3. Keep the Camera Straight and Focused
A photograph taken at an angle may make the signature look distorted or uneven.
Place the paper on a flat surface and position the camera directly above it. Make sure the camera focuses on the signature rather than the background.
If your phone has an autofocus feature, tap the signature area on the screen before capturing the image.
Avoid moving the phone while taking the photograph. Even a small movement can create blur when the camera is too close to the paper.
4. Scan Only the Required Signature Area
A scanner can produce a clearer result than a casual mobile photograph, particularly when the paper is flat and properly positioned.
Place the paper on the scanner glass and ensure it is aligned correctly. Select a suitable colour or grayscale scanning mode according to the application’s instructions.
If the portal asks for only the signature, scan the signature area rather than the entire sheet.
Keep enough space around the writing to prevent accidental cropping. The signature should be fully visible, not touching the image boundary.
The required scanning resolution can vary by application, so follow the specifications in the official instructions rather than assuming that one setting works for every form.
5. Crop Unnecessary Blank Space
Sometimes a signature appears miniature because it occupies only a small portion of a large image.
Cropping can solve this problem by removing unnecessary margins around the writing.
For example, imagine that your signature occupies a small area in the centre of a full-page scan. Uploading the complete page may make the signature difficult to see.
Crop the image around the signature while retaining all its strokes. Do not cut off the beginning, end or upper and lower parts of the handwriting.
After cropping, check whether the image still meets the required dimensions.
How to Improve Signature Image Quality Without Changing the Signature
There is an important difference between improving image quality and altering the signature itself.
Image preparation should make the existing handwriting easier to see. It should not change the shape of the letters, add missing strokes or create a different signature.
You can generally use basic image preparation methods when permitted by the application instructions:
| Image adjustment | Is it useful? | What to watch for |
|---|---|---|
| Cropping | Yes | Do not cut off any part of the signature |
| Correcting image rotation | Yes | Keep the signature in its natural orientation |
| Resizing | Yes, when required | Preserve proportions and readability |
| Moderate compression | Yes, if the file is too large | Avoid excessive quality loss |
| Adjusting exposure slightly | Sometimes | Do not hide or artificially redraw strokes |
| Applying strong sharpening filters | Usually avoid | They can create artificial edges |
| Tracing over the signature | No | It changes the original writing |
| Adding digital strokes | No | It may misrepresent the genuine signature |
If the writing is too faint to recognise, do not rely on editing tools to manufacture missing details. Take a new photograph or scan the original signature again.
How to Resize a Signature Image Without Making It Blurry
Resizing may be necessary when an application portal specifies particular image dimensions or file-size limits.
However, repeatedly resizing an image can reduce its quality, especially if you begin with a small or heavily compressed file.
Use this process:
- Keep a copy of the original photograph or scan.
- Open the clearest version in an image editor or our Free Signature Resizer Tool.
- Check the required width, height, file format and file size.
- Resize the image to the permitted dimensions.
- Preserve the image proportions unless the official instructions specify otherwise.
- Export the file once in the required format and quality.
- Open the exported file and inspect the signature at normal size.
Do not assume that the smallest possible file is the best file. A very small image may meet a size limit but still be too pixelated to read.
You can read our comprehensive Signature Resizer Online Free Guide to learn how to prepare exact dimensions and file size without losing sharpness. Always inspect the result before uploading it.
What Should You Check Before Uploading the Signature?
Every examination, university or recruitment portal may have different image requirements. Check the official instructions before making adjustments.
Your checklist should include the following:
Image Quality
- The signature is readable at normal viewing size.
- All parts of the writing are visible.
- There is no blur caused by camera movement.
- The background does not hide the signature.
- The image is not excessively compressed.
File Requirements
- The file format matches the portal’s instructions (e.g., JPG or JPEG).
- The image dimensions are correct (e.g., 140 × 60 px for IBPS PO 2026, 6.0 × 2.0 cm for SSC CGL 2026, or 350 to 500 px for UPSC CSE 2026).
- The file size is within the permitted range.
- The filename follows any prescribed rules.
- The signature has not been stretched or distorted.
Authenticity
- The image contains your genuine signature.
- No strokes have been added or removed digitally.
- The signature has not been replaced with a typed name or another person’s handwriting.
For a useful official example, the UPSC Online Application FAQ advises applicants to check image specifications and ensure that uploaded photographs and signatures are clearly discernible. The exact rules on format, file size and dimensions differ between application systems, so always consult the notification for your specific exam.
What If the Signature Looks Clear Before Upload but Blurry Afterwards?
If the original image looks good but the application preview does not, check whether the uploaded file is the same file you inspected before submission.
Some common troubleshooting steps may help:
Check the Uploaded Preview
Use the preview option, if available, to inspect the actual image displayed by the application portal. Look at the signature rather than judging the entire screen. A small preview may make a clear image appear smaller, but the writing should still be distinguishable.
Upload the Correct File Again
If the current portal permits replacement, select the clearest prepared file and upload it again. Make sure you are not accidentally choosing an older, low-quality version with a similar filename. If your upload fails entirely, consult our step-by-step guide on Signature Upload Failed in Online Application Form: Causes and Solutions.
Check the File Format and Compression
If the image looks pixelated, prepare a fresh export from the original scan instead of repeatedly compressing the same file. Converting a file to the requested format may help with compatibility, but it will not restore detail lost from an already blurry image.
Check Whether Editing Is Still Allowed
Some portals let you replace an image before final submission, while others restrict changes after submission. Do not assume that you can update the image later. If your application gets rejected due to an unclear signature, read our detailed guide on Government Exam Form Rejected Due to Signature: Reasons and Solutions.
If you need in-person assistance with high-quality document scanning and upload, consider visiting a local CSC centre as outlined in our CSC VLE Online Form Filling Services Guide.
Common Mistakes That Can Make a Signature Difficult to Read
Avoid these mistakes while preparing your file:
- Using a screenshot of a signature: A screenshot may have low resolution, interface elements or extra blank space. Use a clear scan or direct photograph of the signature instead.
- Increasing the size of a tiny image: Enlarging a poor-quality image does not recreate missing details. Start with a better source image.
- Using aggressive filters: Strong contrast, sharpening or other effects can change the appearance of the handwriting. Keep adjustments minimal and use a fresh scan whenever possible.
- Cropping too tightly: Removing unnecessary margins is helpful, but cutting off even part of a signature can make the image unsuitable.
- Ignoring the application preview: An image may look correct in an editing program but fail to display properly after upload. Always inspect the preview before final confirmation.
- Assuming all portals use the same specifications: A file accepted by one examination portal may not meet another portal’s requirements. Check each application separately.
For a comprehensive walkthrough of applying online without making common document mistakes, read our Online Govt Exam Form Guide.