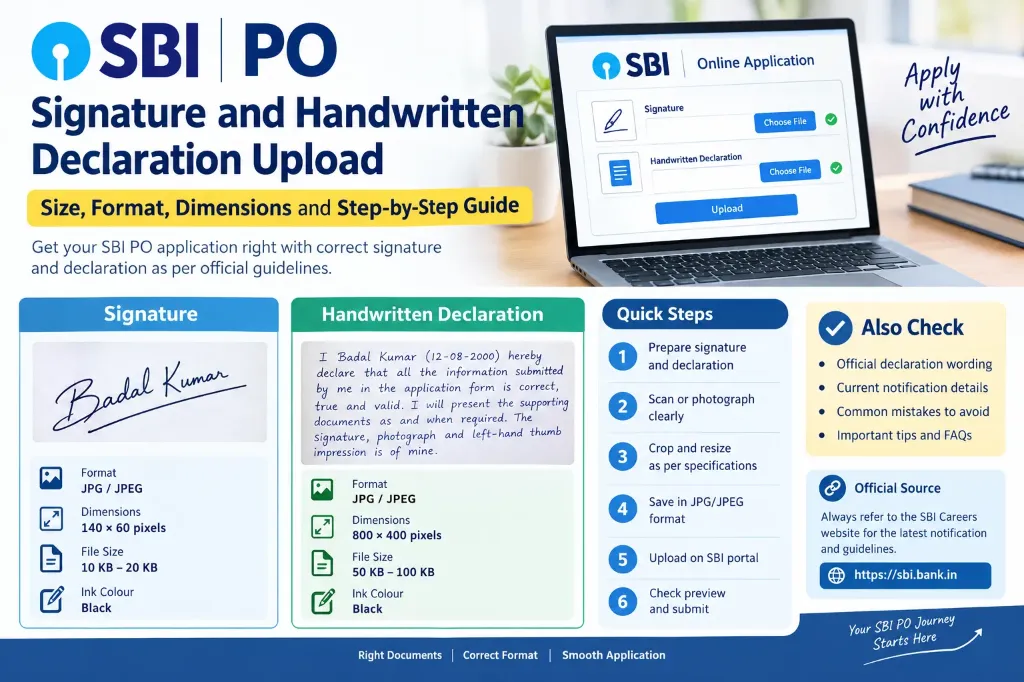
Preparing the signature and handwritten declaration correctly is an important part of the State Bank of India (SBI) Probationary Officer (PO) online application process. Even if you have filled in all your personal and educational details accurately, an image file that does not meet the prescribed technical requirements can trigger errors or create verification issues later.
If you are applying for the SBI PO examination for the first time, this guide will help you prepare both files, understand the exact specifications, write the declaration correctly, and upload your documents smoothly without common errors. (If you are also applying for other banking exams, you can also check our guides on IBPS Clerk Handwritten Declaration vs Signature and IBPS PO Signature Size 2026).
[!NOTE] The instructions below reflect official SBI recruitment guidelines for 2026. Always cross-check the final requirements in the official notification of your specific recruitment cycle before submitting your online form.
SBI PO Signature and Handwritten Declaration: Quick Overview
The table below summarizes the official specifications prescribed in SBI’s 2026 PO recruitment guidelines:
| Requirement | Signature | Handwritten Declaration |
|---|---|---|
| File Format | JPG or JPEG | JPG or JPEG |
| Preferred Dimensions | 140 × 60 pixels | 800 × 400 pixels (approx. 200 DPI) |
| File Size (KB Limit) | 10 KB to 20 KB | 50 KB to 100 KB |
| Paper Type | Plain white paper (unlined) | Plain white paper (unruled) |
| Ink Colour | Black ink pen | Black ink pen |
| Writing Style | Regular running signature | English handwriting (not capital letters) |
| Who Must Prepare It | Applicant personally | Applicant personally |
[!TIP] You can resize both your signature and declaration to the exact pixel dimensions and file size using our free online Signature Resizer tool or via mobile on the Signature Resizer for Mobile Phone.
What Is an SBI PO Handwritten Declaration?
A handwritten declaration is a brief, formal statement written by the applicant in their own handwriting. Its purpose is to legally certify that all information submitted in the online application is true, complete, and valid, and that original supporting documents will be produced whenever requested by the bank.
It is fundamentally different from a signature:
- Your Signature serves as an identity mark to verify that you are the person appearing for the exam and joining the bank.
- The Handwritten Declaration acts as a self-attested confirmation of the truthfulness of your application data and allows the bank to verify your handwriting sample.
SBI requires candidates to write the declaration word-for-word as published in the official advertisement.
SBI PO Handwritten Declaration Official Text
For the SBI PO recruitment cycle, the official notification prescribes the following declaration text:
"I________(Name of the candidate), _______(Date of Birth) hereby declare that all the information submitted by me in the application form is correct, true and valid. I will present the supporting documents as and when required. The signature, photograph and left-hand thumb impression is of mine."Example of Filled Declaration:
If your name is Badal Kumar and date of birth is 12-08-2000, your handwritten declaration should read:
“I Badal Kumar, 12-08-2000 hereby declare that all the information submitted by me in the application form is correct, true and valid. I will present the supporting documents as and when required. The signature, photograph and left-hand thumb impression is of mine.”
[!WARNING]
- Write in your own handwriting: Never let anyone else write this for you.
- Do NOT use CAPITAL LETTERS: A declaration written entirely in capital (BLOCK) letters is rejected by SBI.
- Do NOT alter the text: Do not add or remove words. Stick exactly to the prescribed sentence.
- Language: The declaration must be written in English only.
How to Prepare the SBI PO Handwritten Declaration
Follow these step-by-step instructions to create an acceptable declaration file:
  [Step 1: Clean White Paper]
             ↓
  [Step 2: Write with Black Gel/Ball Pen]
             ↓
  [Step 3: Scan / Photograph in Good Light]
             ↓
  [Step 4: Crop Margins (Leave Padding)]
             ↓
  [Step 5: Resize to 800×400 px, 50-100 KB]
             ↓
  [Step 6: Save as JPG/JPEG & Upload]
Step 1: Take a Clean White Sheet of Paper
Use a plain, unruled A4 white sheet without lines, grids, stains, or background watermarks. Ruled notebook paper can interfere with OCR scanning.
Step 2: Use a Black Ink Pen
Use a clean black ballpoint or gel pen with a bold tip. Avoid blue, red, green, or faint pencil ink. Black ink provides sharp contrast against the white page.
Step 3: Write Clearly in Your Normal Handwriting
Write at a comfortable, natural pace. Ensure adequate spacing between words and letters so every word is distinct and legible.
Avoid these common mistakes:
- Writing the entire paragraph in capital letters.
- Typing and printing the statement instead of handwriting it.
- Overcrowding words to squeeze them into one line.
- Omitting your name or date of birth.
- Making spelling corrections or overwriting words.
Step 4: Scan or Photograph the Declaration
Place the paper on a flat table under daylight or bright white lighting. You can use a flatbed scanner (set to 200 DPI) or your smartphone. For smartphone tips, check our complete walkthrough on How to Scan Signature Using Mobile for Exam Form.
- Keep the camera parallel to the paper to prevent perspective distortion.
- Make sure no shadow falls across the text.
Step 5: Crop and Resize the Image
Crop out extra empty paper surrounding the paragraph, leaving a slight, clean border.
- Target dimensions: 800 × 400 pixels.
- Do not stretch the image disproportionately, which can make the handwriting look warped or blurry. If you run into dimension issues, refer to our guide on Invalid Image Dimensions Error in Exam Form.
Step 6: Save as JPG/JPEG (50 KB to 100 KB)
Save the file as .jpg or .jpeg. Confirm that the final file size sits comfortably between 50 KB and 100 KB. If your file is a PNG, convert it using an image editor rather than merely renaming the extension.
How to Prepare the SBI PO Signature Image
Your signature is compared during the Preliminary Exam, Main Exam, Interview, and final joining. Consistency is vital.
Step 1: Sign on Plain White Paper
Sign with your usual signature on a fresh white unruled sheet using a black ink pen.
- Do not sign in capital letters.
- Do not use stylized initials that you cannot replicate during the examination hall sign-in.
Step 2: Keep Your Signature Consistent
Use the exact same signature style that appears on your PAN Card, Aadhaar Card, or bank account. A noticeable signature discrepancy between exam stages can lead to scrutiny or disqualification. For more on this, read Government Exam Form Rejected Due to Signature.
Step 3: Scan and Crop
Capture the signature clearly in sharp focus. Crop close to the signature strokes while leaving a small breathing margin.
Step 4: Resize to 140 × 60 Pixels
Use the Signature Resizer tool to set dimensions to 140 pixels wide by 60 pixels high. Maintain the aspect ratio so the signature strokes do not look squished or stretched.
Step 5: Save as JPG (10 KB to 20 KB)
Ensure the final output file is formatted as JPG/JPEG and the size stays within 10 KB to 20 KB. Test opening the file at 100% zoom: if the ink strokes appear pixelated or blurry, see Signature Image Not Clear in Application Form for quick clarity fixes.
Step-by-Step Guide: How to Upload on the SBI PO Portal
When registration opens on the official portal, follow these steps to upload your documents:
- Visit the Official Portal: Go to the SBI Careers Current Openings Portal and open the active Probationary Officers recruitment link.
- Login to Your Application: Enter your Registration Number and Password/Date of Birth.
- Navigate to the Document Upload Section: You will find dedicated upload fields for Photograph, Signature, Left Thumb Impression, and Handwritten Declaration.
- Upload the Signature: Click Choose File under the Signature field, pick your
140x60 px(10–20 KB) JPG file, and confirm. - Upload the Handwritten Declaration: Click Choose File under the Declaration field, select your
800x400 px(50–100 KB) JPG file, and confirm. - Carefully Check the On-Screen Previews: The portal will display preview thumbnails of both uploads.
- Verify that your signature is oriented horizontally and right-side up.
- Verify that the entire declaration text is crisp and readable without zooming.
- Verify that you did not accidentally swap the two files!
- Proceed & Save: Once confirmed, save and proceed to the final review and fee payment steps. Keep a downloaded copy of your completed application form for your records. (If you experience any upload stalls, refer to our troubleshooting guide on Signature Upload Failed in Online Application Form).
Common SBI PO Upload Errors and Solutions
| Upload Error Message / Issue | Root Cause | Practical Solution |
|---|---|---|
| File size exceeds limit / File size too small | File size is outside 10–20 KB (sig) or 50–100 KB (dec) | Compress or re-export using Signature Resizer to fit the target KB range |
| Invalid file format / file type not supported | File saved as PNG, PDF, WEBP, or renamed manually | Open the image in Paint or an image editor and Export/Save As genuine JPG/JPEG |
| Invalid image dimensions | Width and height don’t match 140×60 px or 800×400 px | Set exact pixel dimensions in the resizer before saving |
| Signature or declaration blurry in preview | Low scanning resolution or excessive compression | Re-scan at 200+ DPI in daylight and compress with quality set at 80–85% |
| Declaration rejected / capital letters | Entire text was written in BLOCK/CAPITAL letters | Rewrite the declaration in natural cursive/running English handwriting |
| Wrong document in wrong field | Signature uploaded into Declaration box or vice versa | Re-select and re-upload the correct files in their corresponding fields |
Pre-Submission Verification Checklist
Before hitting the final submit button on your SBI PO application form, run through this quick checklist:
- Signature written with a black ink pen on clean white unruled paper.
- Signature represents your regular signing style (not full name in capital letters).
- Signature dimensions are 140 × 60 pixels, size is between 10 KB and 20 KB, format is JPG.
- Handwritten Declaration written in your own English handwriting (never typed or printed).
- Declaration contains your correct full name and date of birth in the blanks.
- Declaration is not written in capital letters.
- Declaration dimensions are 800 × 400 pixels, size is between 50 KB and 100 KB, format is JPG.
- Files are named simply (e.g.,
sbi-signature.jpgandsbi-declaration.jpg) without special characters. - Previews verified on the portal screen before final confirmation.
- Application form PDF downloaded and stored securely on your device.
Related Guides & Banking Exam Resources
- IBPS Clerk Handwritten Declaration vs Signature: Key Differences & Upload Rules
- IBPS PO Signature Size 2026: Official Guidelines & Rules
- Documents Required for Government Job Online Application
- Invalid Image Dimensions Error in Exam Form: How to Fix It
- How to Scan Signature Using Mobile for Exam Form
- Signature Resizer for Mobile Phone: Free Online Tool
- Government Exam Form Rejected Due to Signature: Common Causes & Remedies
- Online Government Exam Form Complete Guide