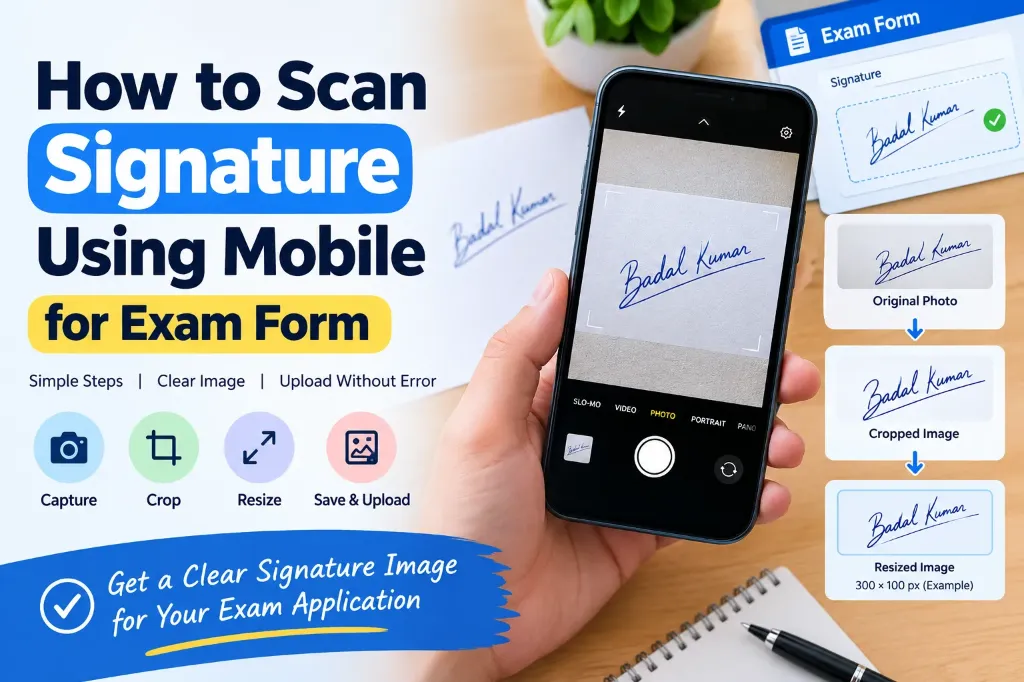
Submitting an online exam form becomes easier when you have all the required documents ready. However, many students face problems while uploading their handwritten signature. The image may appear blurry, the background may look grey, or the file size and dimensions may not match the instructions given on the application portal.
The good news is that you do not need a computer or a separate scanner to prepare your signature. You can use your smartphone to capture, crop, resize, and save a clear signature image for most online examination forms.
In this guide, you will learn how to scan signature using mobile for exam form, which apps you can use, how to prepare the image correctly, and what to check before uploading it. If you are preparing other paperwork as well, review our complete checklist of documents required for government job applications.
Can You Scan a Signature Using a Mobile Phone?
Yes, you can scan your handwritten signature using an Android phone or an iPhone. A modern phone camera is more than sufficient if you have good lighting, a plain background, and a steady hand.
You can use your phone’s default camera or a document-scanning app to capture the signature. After taking the picture, crop the image to remove unnecessary white space and save it in the format required by the examination portal.
Remember that scanning the signature and preparing it for upload are two different steps:
- Scanning captures the handwriting onto your device.
- Resizing ensures the file size (KB) and dimensions (pixels) match portal rules.
A crystal-clear image may still be rejected if its file size, dimensions, or format do not meet the official requirements. If you encounter upload rejections, check our guide on how to fix invalid image dimensions errors in exam forms.
What You Need Before Scanning Your Signature
Before starting, arrange the following items:
- A clean white sheet of paper: Plain, unruled printer paper (A4) works best. Avoid lined notebook paper.
- A black or blue ink pen: Gel, ballpoint, or fountain pen depending on the exam instructions.
- A smartphone with a working camera: Clean the lens before taking photos.
- A well-lit area: Natural window daylight is ideal.
- A document-scanning app or image editor: Or use our online Signature Resizer Tool directly in your mobile browser.
- The official exam notification: Keep the required KB range and pixel dimensions handy.
Use your normal handwritten signature. Do not create a new signature just for the application if it differs significantly from the one you usually use on legal documents.
If the examination authority specifies a particular pen colour, paper size, signature box, or signing style, follow those instructions first.
Step 1: Sign on a Plain White Paper
Start by taking a clean sheet of white paper. Place it on a flat, solid surface and smooth out any folds or wrinkles.
Write your complete signature using a pen that produces clear, visible, dark strokes. Avoid using a pen that is nearly empty, leaks blotches, or leaves faint lines.
Keep these points in mind:
- Sign naturally: Write as you would on any official document or bank check.
- Leave margin space: Leave some empty white space around the signature for easy cropping.
- Avoid corrections: Do not overwrite, scribble, or use correction fluid over mistakes.
- Avoid all-capital letters: Do not write your name in capital block letters unless the notification explicitly permits it. Many boards (like SSC and IBPS) disqualify forms signed in capital letters.
- No decorative borders: Do not draw boxes or decorative borders around the signature unless the portal asks you to sign inside a designated box.
[!TIP] Helpful Tip: Make two or three practice signatures on a separate sheet, then select the cleanest, sharpest one to photograph. This saves significant editing time later.
Step 2: Arrange Proper Lighting and Background
Lighting has a major effect on the quality of your scanned signature. Poor lighting can make the paper look dark or grey, while direct flash creates glare and harsh shadows.
For the best result, place your paper near a window where bright, diffused natural daylight is available.
Follow these simple tips:
- Use bright, even lighting: Position the paper where light falls evenly from both sides.
- Avoid overhead spotlights: Strong ceiling bulbs directly above cause your phone or hands to cast shadows across the paper.
- Turn off camera flash: Flash reflects off white paper and makes ink look washed out.
- Keep your phone’s shadow away: Tilt the paper slightly towards the window if needed so your phone doesn’t block the light.
- Keep the paper flat: Use a clipboard or tape the corners if the paper curls up.
- Clean the camera lens: Wipe fingerprint smudges off your phone camera glass with a microfiber cloth.
If you struggle with blurry or dark scans, consult our troubleshooting guide on Signature Image Not Clear in Application Form: How to Fix It.
Step 3: Capture the Signature With Your Mobile Camera
Once the paper and lighting are ready, open your phone’s camera app.
Place the phone directly above the signature paper. Keep the camera parallel to the surface instead of taking the picture from an angle. An angled photograph distorts the signature and makes one side appear elongated or stretched.
       [ Mobile Phone ]  <- Hold parallel & flat
            |
            v  (90° angle)
    ===================  <- Paper on flat desk
        "Signature"
Follow these steps:
- Position the signature in the centre of the camera viewfinder.
- Make sure the complete signature is clearly visible.
- Hold the phone steadily with both hands, resting your elbows on the table for stability.
- Tap the signature strokes on your screen to trigger autofocus and exposure lock.
- Press the shutter button smoothly without shaking the phone.
- Open the captured photograph and zoom in to verify the ink strokes.
If the signature looks blurred or noisy, retake the photo immediately. Do not rely on photo-editing software to sharpen a photo that has motion blur.
Step 4: Scan the Signature Using a Mobile App
Depending on your mobile operating system and preferences, you have three reliable options:
Option 1: Use Your Phone’s Default Camera & Gallery
This is the fastest method if you prefer not installing additional apps:
- Open your default Camera app.
- Capture the signature on plain white paper in good light.
- Open the photo in your Gallery / Photos app.
- Select Edit and choose the Crop tool.
- Drag the cropping handles to remove the surrounding paper, leaving a neat margin around the signature.
- Save the edited image as a copy.
Option 2: Use Google Drive on Android
Google Drive has a powerful built-in scanner that automatically enhances contrast and removes grey paper tones:
- Open the Google Drive app on your Android device.
- Tap the + (Create) or camera icon and select Scan.
- Position your camera over the signature. Drive will detect the edges automatically.
- Take the scan and tap the Crop / Filter button.
- Change the color filter to Black & White or Color Drawing to make the background bright white and ink crisp.
- Save the scan.
- For detailed steps, check the official guide on How to scan documents with Google Drive.
Option 3: Use the Notes App on iPhone (iOS)
Apple iPhones feature a document scanner built directly into the Notes app:
- Open the Notes app and create a new note.
- Tap the Camera icon in the toolbar.
- Tap Scan Documents.
- Point the camera at your signature; iOS will highlight the paper in yellow and capture it.
- Adjust the corners if necessary and tap Save.
- For official instructions, visit Apple Support: Scan documents on iPhone or iPad.
[!NOTE] Apple Notes often exports scans as PDF files. If your exam portal requires a JPG or PNG file, use your normal iPhone camera and crop the image in the Photos app, or convert the PDF using an online tool.
Step 5: Crop the Signature Image Properly
Cropping removes excessive empty paper around your signature. This step is critical because an uncropped photo will make your signature appear tiny and illegible when compressed to the portal’s display area.
+---------------------------------------+
|  [X] INCORRECT (Too much blank paper) |
|                                       |
|               Badal Kumar             |
|                                       |
+---------------------------------------+

+-----------------------+
|  [OK] CORRECT CROP    |
|   Badal Kumar         |
+-----------------------+
To crop effectively:
- Open the image in your gallery or crop tool.
- Select the Crop tool.
- Move the crop box borders close to your signature.
- Maintain a comfortable white margin (around 5% to 10%) on all four sides.
- Ensure no loop, dot of an “i”, or t-cross is cut off.
- Save the cropped version as a new file.
Do not crop right against the ink strokes, as some exam portals automatically add border padding that might clip the edges.
Step 6: Resize the Image to Match Exam Form Requirements
After cropping, your image will likely still be 1000+ pixels wide and several megabytes in file size. Government job portals strictly reject images exceeding their limits.
Understanding the difference between image measurements is crucial:
| Requirement | What It Means | Typical Exam Value |
|---|---|---|
| Pixel Dimensions | Digital width and height of the image canvas | 140 × 60 px (SSC / IBPS), 350 × 350 px (UPSC) |
| File Size (KB) | Storage space the file consumes on disk | 10 KB – 20 KB (SSC), 20 KB – 300 KB (UPSC) |
| Physical Dimensions | Printed size on real paper | 3.5 cm × 1.5 cm |
These measurements are independent. An image can be under 20 KB but still get rejected for having invalid pixel dimensions!
How to Resize Online in Seconds:
- Open our free Signature Resizer Online Free tool in your mobile browser.
- Upload your cropped signature photograph.
- Select your exam preset (e.g., SSC CGL / CHSL, UPSC Civil Services, or IBPS Bank PO / Clerk).
- Or manually enter the target width, height, and maximum KB limit.
- Click Download to save the perfectly optimized image.
Step 7: Save the Signature in the Correct Format
Application portals are strict about allowed file extensions. Uploading an incompatible file will result in an immediate upload error.
| Format | When to Use It | Notes |
|---|---|---|
| JPG / JPEG | Almost all government exam portals (SSC, UPSC, IBPS, Railways, State PSC) | Best compression and universal compatibility |
| PNG | Accepted by some university portals and private job portals | High clarity, but produces larger file sizes |
| Rare for signatures; used for declarations and marksheets | Do not upload unless explicitly requested |
[!WARNING] Simply renaming a file from
signature.pngorsignature.pdftosignature.jpgwill not convert the format. It corrupts the file header and causes a “Corrupted image file” upload error. Always use an image editor or resizer to export the file properly.
Before uploading, save the file with a clear, simple filename such as my_signature.jpg. Avoid spaces, special characters (#, @, %), or multiple dots in the filename.
Common Signature Scanning Problems and Their Solutions
| Problem | Root Cause | Solution |
|---|---|---|
| Signature looks blurry | Camera out of focus or hand shaking | Rest elbows on desk, tap screen to focus, and retake in bright light. |
| Background looks dark or grey | Dim indoor lighting or shadows | Sign near a window with daylight; avoid overhead lights. |
| Signature appears tiny after upload | Extra blank paper wasn’t cropped | Crop close to the signature strokes before resizing. |
| File size is too large (> 50 KB) | High-resolution mobile camera photo | Use our Signature Resizer to compress it to 10–20 KB. |
| Invalid image dimensions error | Width and height in pixels don’t match rules | Set exact pixel values (e.g., 140 × 60 px) in the resizer. |
| Portal rejects file extension | Uploaded HEIC, WebP, or renamed PDF | Export as a standard .jpg or .jpeg file. |
| Signature looks stretched or squashed | Aspect ratio was locked or forced incorrectly | Maintain proportional scaling when adjusting dimensions. |
| Upload failed without clear message | Session timed out or browser incompatible | Clear browser cache, use Google Chrome, or try incognito mode. See our guide on signature upload failure fixes. |
Final Checklist Before Uploading Your Signature
Before hitting the submit button on your application portal, run through this quick checklist:
- Legibility: Signature strokes are sharp, continuous, and clearly readable.
- Genuine Signature: It matches your normal handwriting on official ID cards (Aadhaar / PAN).
- Clean Background: The background is white or off-white with zero shadows or paper textures.
- No Cropping Errors: No letters, dots, or tails of the signature are cut off.
- Pixel Dimensions: Width and height match the notification (e.g., 140 × 60 px for SSC/IBPS).
- File Size Range: The file size is within the allowed range (e.g., between 10 KB and 20 KB).
- File Format: The file is saved as
.jpgor.jpeg(not HEIC or PDF). - Preview Verification: The signature preview on the portal looks balanced and undistorted.
Keep a backup copy of your cropped and resized signature on your smartphone (in Google Drive or a dedicated folder) so you can readily use it for future applications.
Related Examination Guides & Tools
If you are applying for specific competitive exams, refer to our specialized presets and guides: